Table of Contents
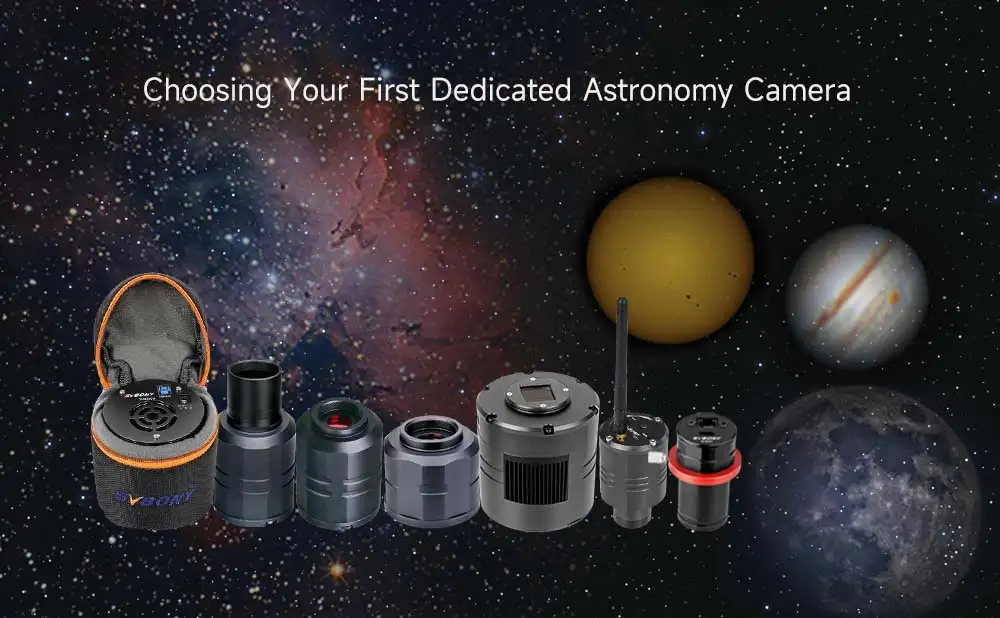
Choosing Your First Dedicated Astronomy Camera
If you're thinking about buying your first astronomy camera, it can be overwhelming! Should I choose a monochrome or color camera? Which brand should I choose? Do I need filters? How do I use the camera? We have a lot to cover, so let's get started!
DSLR vs Specialized Astronomy Cameras
If you're a DSLR user, you're likely familiar with some inherent limitations. DSLRs include Bayer arrays, IR cutoff filters, and may not have cooling features. During astrophotography, especially with long exposures (1-5 minutes), the sensor generates significant heat, leading to “hot pixels”—those colorful dots that can appear in your images. While there are methods to remove hot pixels, such as in-camera settings or post-processing, it's generally better to cool the sensor down.
Dedicated astronomical cameras are specifically designed to address these issues! They often come with built-in cooling to keep the sensor cooler, limiting heat-related noise. Additionally, most astronomical cameras lack infrared cutoff filters, making them more sensitive to near-infrared wavelengths. Monochrome cameras, which do not use Bayer arrays, are even more sensitive to light and produce higher-quality images.
However, there are some drawbacks. Unlike DSLRs, dedicated astronomy cameras usually don't feature LCD screens or buttons, meaning you'll control everything from a laptop or smartphone. Furthermore, they often have lower-resolution sensors compared to DSLRs, which might affect large prints.
Ultimately which to choose? You can still take some amazing photos with a DSLR though! However, as you gradually reach the limits of your DSLR and want to take things to the next level, you may need to decide which type of astronomical camera to buy - monochrome or color?
Monochrome or Color?
Astronomical cameras typically come in two varieties: monochrome or color. Choosing between them drastically alters your workflow. Monochrome cameras require more work and money, but usually provide higher quality images. Color cameras are relatively simple to use, but the results are usually not as good as monochrome cameras.
If you want to keep it simple and inexpensive, we recommend using a color camera first.
For beginners seeking a straightforward experience, starting with a color camera is recommended. However, if you’re ready for a challenge and have the necessary budget, consider investing in a monochrome camera right from the start. Since monochrome cameras will only take black and white images, they will never be able to take color images. To be clear, if you use filters and special post-processing, you can eventually create color photos. But the camera itself will always produce monochrome images.
Filters: LRGB and Narrowband
If you want to make the most of your monochrome camera, you need to buy at least one set of filters. The most common are the “LRGB” - Luminance, Red, Green and Blue. These filters will be attached to your telescope or filter wheel and will only allow a specific range of wavelengths to pass through. For example, a red filter will allow light waves between 600nm - 700nm to pass through the camera sensor. The image will still be monochromatic, but you will only capture the red wavelengths. You can then switch to the blue filter to take another image, this time capturing only the blue wavelengths. The same applies to the color green. The brightness filter will allow you to capture all wavelengths between 400nm and 700nm! This brightness filter is primarily used to capture the details of nebulae. Once you have captured the separate red, green, and blue channels, as well as the luminance image, you can create a color photo in post-processing! There are a few different ways to do this, but we'll get to that later in the post.
It's important to understand that you need to take four sets of photos using the LRGB filter. If you're using a color camera, you simply take one set of photos, stack them, and start processing. As a result, it can take up to four times as long to create an image with a monochrome camera! You'll also need to stack each color channel independently, which will increase editing time.

Narrow Band Filters
Alternatively, narrowband filters can be used to capture images in light-polluted areas or during full moons. These filters allow only certain wavelengths of light to pass through. The three narrow band filters are usually - Hydrogen Alpha (Ha), Oxygen (OIII) and Sulfur (SII). Because these sho filters only allow a very small range of wavelengths to pass through, other light, including light pollution and moonlight, is blocked! Once you take a photo with at least two of these filters, you can create a color image in post-processing. However, these colors will not be “true” colors. When editing a photo, you can use a variety of “color palettes” to change the look of the final image. I
Pixel Size and Sensor Size
Pixel size and sensor size are crucial factors affecting image quality. Choose a camera with pixel dimensions suitable for your telescope or lens. Most people are probably no strangers to sensor size, as it's a familiar topic for DSLR camera users. Full-frame camera sensors are 36mm x 24mm. Really a large size! These cameras perform better in low-light conditions, and also don't have any crop factor, which allows you to get a wide field of view with wide-angle lenses.
As the sensor size decreases, low-light performance typically decreases and crop factors must be considered. APS-C is the most common crop factor and is typically found on most entry-level Canon, Sony, and Nikon cameras.APS-C sensors measure 23.5mm x 15.6mm on Nikon and 22.3 x 14.9mm on Canon. Due to the smaller sensor, the image is magnified 1.5x (Nikon) or 1.6x (Canon). Therefore, you must multiply the actual focal length of the lens or telescope to get the correct field of view. For example, putting a 500mm lens on an APS-C camera will have the same field of view as a 750mm lens on a full-frame camera (500mm x 1.5 = 750mm).
Most specialized astronomy cameras have either a 1″ sensor or a Micro Four Thirds (4/3″) sensor. Compared to a full-frame camera, a 1″ sensor has a 2.7x crop; this means that a 500mm lens placed on this sensor will have the same field of view as a 1,350mm lens on a full-frame camera! Meanwhile, the 4/3″ sensor has a 2x crop. As you can see, these small sensors have a huge impact on the photos you're able to capture!

Arcseconds Per Pixel
To ensure optimal performance, pair your astronomy camera with the appropriate telescope or lens. Use the following formula to determine compatibility:
(Pixel Size / Focal Length) x 206 = Arc Seconds per Pixel
Planetary Imaging vs. Deep Sky Astrophotography
Planetary Imaging
Most amateurs begin their astrophotography journey with the Moon and planets. For capturing these bright objects, short video recordings (about a minute) are recommended. By stacking multiple video frames, you can create impressive final images. Higher focal lengths are advisable when targeting planets due to their small size in the night sky.
Deep Sky Astrophotography
Deep sky astrophotography is very different from planetary imaging. Deep sky astrophotography is capturing the faint light from objects far away from our solar system, often hundreds, thousands or even millions of light years away. Herein lies the main challenge of deep-sky astrophotography; you must expose deep-sky objects such as nebulae, star clusters, or galaxies for several minutes in order to capture the faint, ancient light from deep space. In order to do this, you need not only a high-quality camera to take long-exposure photographs, but also other equipment, such as a high-quality equatorial instrument to track the movement of objects in the night sky due to the Earth's rotation. Astrophotographers end up taking multiple photos of the same object in space, resulting in hours or even days of data. In astrophotography, data refers to the number and exposure time of all the photos you take of a single object in space. These images are then stacked and further processed to create the final image of the deep space object.
Key Camera Specifications

When selecting a camera for planetary or deep sky astrophotography, pay attention to:
Frames Per Second (FPS)
Frames per second, or FPS for short, is important only for planetary imaging.FPS is the number of images a camera can take per second. In many Hollywood movies, a standard FPS of 24 frames per second is used, but there are exceptions, and some movies are shot at speeds up to 120 FPS for smooth, slow-motion scenes. So what does FPS mean for planetary imaging? Simply put, the higher the FPS, the more images can be captured per second. For example, a camera with 25 FPS can take 1,500 pictures a minute, while a camera with 50 FPS can take 3,000 frames per minute. Doubling the number of frames allows you to select and stack the highest quality frames. If you're lucky enough to have 10 seconds of good astronomy in a one-minute video, you'll get 500 high-quality planetary frames at 50 FPS and 1,000 frames at 100 FPS. Even if the astronomical observations are stable throughout the video, you'll still want to get more images because you'll be able to stack up to twice as many images to produce the final picture, thus improving the signal-to-noise ratio. is there no limit to the FPS speed? Yes, there is a limit because shorter exposure times are also associated with the need to increase the gain of the camera, which introduces more noise in the video. However, it is much better to have a high FPS planetary camera that can be slowed down at any time than a low FPS camera that cannot increase FPS. For deep sky astrophotography, FPS doesn't matter at all because you're taking long exposure photos of dim objects in deep space.
Cooling Systems

Most specialized deep-sky astrophotography cameras are equipped with a cooling system designed to cool the camera to subfreezing temperatures. The reason for this is that heat tends to build up in the CMOS sensor during long exposures to photograph deep sky objects. This heat buildup causes dark current noise in the picture and unwanted electrons to appear on the image that are unrelated to the light falling on the sensor. The cooling system on the camera will minimize the unwanted dark current noise. Most camera cooling systems reduce dark current by half for every 5 degrees of cooling, so it makes sense to cool the camera sensor as much as possible. This is why most deep sky astronomy cameras are equipped with thermoelectric coolers that can cool the camera sensor to about -35 degrees below ambient temperature. I must point out that deep sky astrophotography does not require cooling. Many people have digital SLR cameras. Some techniques to avoid dark current noise without cooling are to dither between images and subtract dark frames that match the exposure time and bright frame temperature. I won't go into the technical details of this, that's for another video. In my opinion, for deep sky astrophotography, it's best to use a camera with a cooler because it keeps dark current noise to a minimum, which is always better than trying to eliminate noise when it's already present in a deep sky photo.
For planetary imaging, however, the benefit of a cooling system is negligible. Although the camera sensor gets very hot when shooting video at high frame rates per second, the exposure time is so short that dark current does not have time to build up in each frame.
Read Noise
Read noise is the noise of the camera electronics. As each pixel value is read out, some extra electrons are randomly lost or gained, causing the readout to be slightly different from the actual captured signal. Readout noise has the greatest impact on weak signals. Readout noise is therefore very important for deep-sky astrophotography as we try to capture the faint light from deep-sky objects. Unlike other noise sources (such as dark current noise), read noise is independent of factors such as exposure time or cooling. This means that you will get a similar amount of read noise whether the exposure time is short or long, and whether or not cooling is used. The best weapon against read noise (and other types of noise) is to increase the exposure time. Noise increases only with the square root of the signal, so the longer the exposure time, the more likely it is that weak photons from deep space objects will outweigh the camera noise. The best alternative to increasing exposure time is to buy a higher quality camera that produces less read noise in the first place. Arguably, low read noise is even more important for deep-sky astrophotography because the planets already have a strong signal, as they are bright objects illuminated by our own sun.
Quantum Efficiency (QE)

Quantum efficiency is the efficiency with which an astronomical camera records photons and converts them into a digital signal. If 20 photons fall on a single pixel of the camera's sensor, then ideally that pixel will read 20. QE is usually expressed as a percentage and in QE charts, which show how efficiently the camera converts photons into electrons at different wavelengths of light. For example, if the average QE is only 50%, the sensor converts only half of the photons falling on the camera's sensor into a digital signal. High-end sensors have a QE of about 90%, which means that these cameras are more sensitive and can convert almost all photons into a digital signal. In general, cameras with higher QE are better.
Conclusion
Choosing the right astronomy camera involves understanding your specific needs, whether you’re focused on planetary imaging or deep sky photography. Consider aspects like sensor size, cooling capabilities, and whether a monochrome or color camera aligns with your goals. With the right setup and knowledge, you'll be well-equipped to embark on your astrophotography journey and capture the wonders of the universe!
If you have any questions or need further assistance in selecting your equipment, feel free to reach out. Happy stargazing!
There are no customer reviews yet . Leave a Reply !