Table of Contents
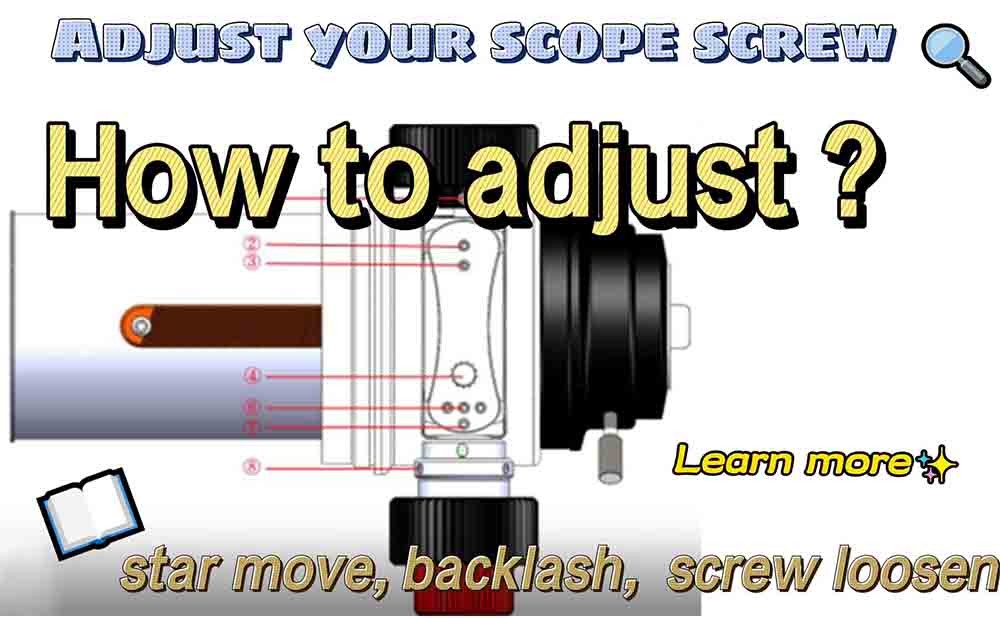
SV503 Focuser Screw Notes and Adjustment Methods
Recently many fans met the focuser question, so I want to give a tutorial here about how to adjust your screw to save time.
1. Suggestions
First of all, the focuser can handle 2KG without any problems and won't sag, you should check the bottom weight if yes. If you see the tilt in your images, check the two screws if they are loosened. There are some nice suggestions from our fans.
Jason Jacks: I was taking moon pictures last night and noticed a good amount of movement when moving the focuser with the EAF. Turns out my draw tube was wobbling quite a bit and was drooping from the weight of the flattener, camera, and filter wheel. These two screws were not even a little bit tightened, they were pretty much loose. Now my draw tube is rock solid.
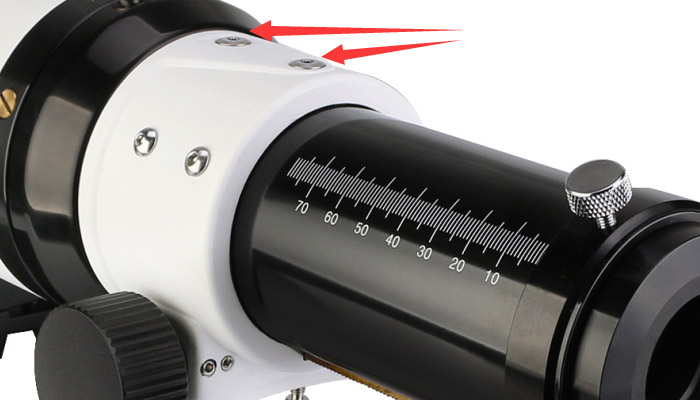
Minh Truong Nguyen: There are usually 3 screws on the focuser drawtube spread out in 3 120-degrees-spaced positions to compensate for the focuser slop. Tightening on 1 side, especially on the top will only worsen your tilt. Try then tension bolts in the underside of your focuser. It both helps the focuser stay straight and increases friction in the focuser, reducing the slippage.
Tip: Press the top brass screws not very tight. The pressing force of these three screws should be as consistent as possible, otherwise, the torque will increase if pressed too tightly, which will cause the image to jump.
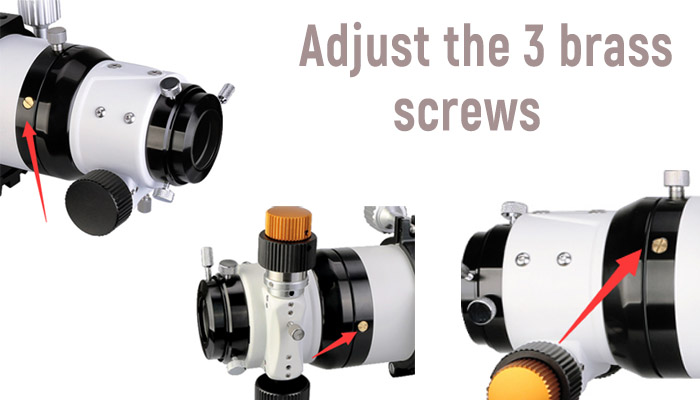
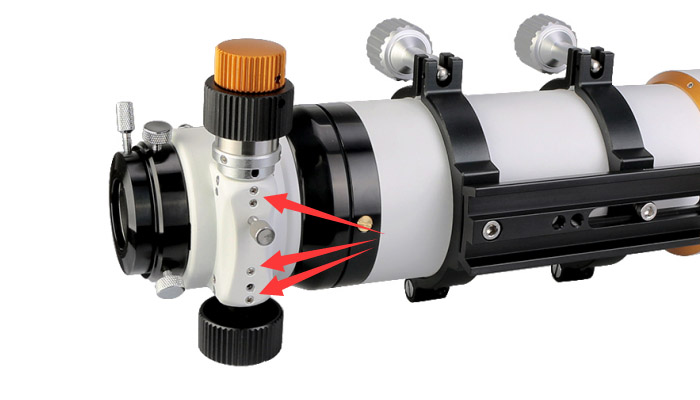
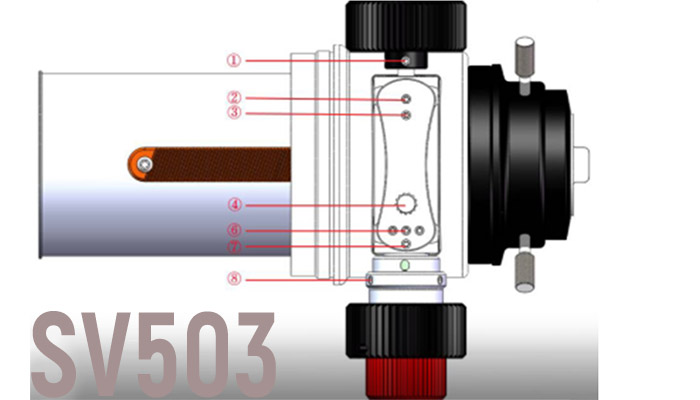
And why we don't make a manual about how to fix this? Trust me, even experienced Astronomers won't do better than the telescope factory workers, turning the screwdriver one more turn may decide whether you can do focusing smoothly or not. The next image shows the screws control focusing handwheel friction, which usually doesn't need to adjust.
2. Guide manual
SV503:
1. Focusing handwheel fixing screw;
4. Focusing screw (adjust friction);
2, 3, 6, 7, 8. Structure adjustment screw, please do not adjust it at will, it will affect the focusing feel.
Thanks for reading.
Comments (3 )
Guest
So I fell asleep last night during imaging and didn't do the Meridian flip when needed. Needless to say, my focuser tube of my svbony 102mm refractor was being mashed against the tripod leg for probably 4 hours. The focuser tube now wobbles. Are there adj
Chris Mahar
The bottom of the focuser on my SVBony SV503 does not look like that. There are five allen head screws and one focus friction adjust screw all in a row. I'm trying to mount a ZWO EAF. Which screws can I use for this?
could you send a photo of your sv503,we will guide you for using the eaf,thanks


Markus Davis
Hello there I have a SV503 102ED, which I like very much. It has developed very obvious image shift whenever I adjust the focus in either direction . I've read your focuser adjuster screw notes and wondered if could clarify the following? One person sug
svbony Elena
Thanks for your message, please check if the pair of chrome screws on the top need tightening.
Markus Davis
Hi Elena, I have checked the pair of chrome screws on top and they are tight. I am wondering if any of the 5 screws between the focuser adjustment wheels may need adjusting?. Incidentally, I haven't been able to find any screwdrivers with a thin enough blade to fit the brass screw slots (they look to be about 0.75mm wide?). What tool or screwdriver do you recommend for these? Thanks, Markus.
Markus
I thought I replied earlier, but it doesn't seem so. No, the two chrome screws are very well secured. I'll nonetheless check the brass ones again, though I'm unlikely to be able to check the image shift at night for quite some days as the weather forecast is very unsettled. Its also worth mentioning that I could not find any screwdriver blade that was sufficiently thin to fit the brass screw slots (they seem to be about 0.75mm thick), and wide enough (say 6-7mm). No doubt your factory workers use a suitable screwdriver, or is a special tool required? Cheers, Markus.
Hi,sir,if you need any help,pls contact with our aftersale colleague:info@svbony.com foe a video,thanks