Cheap and good quality - Svbony SV555 Reviews
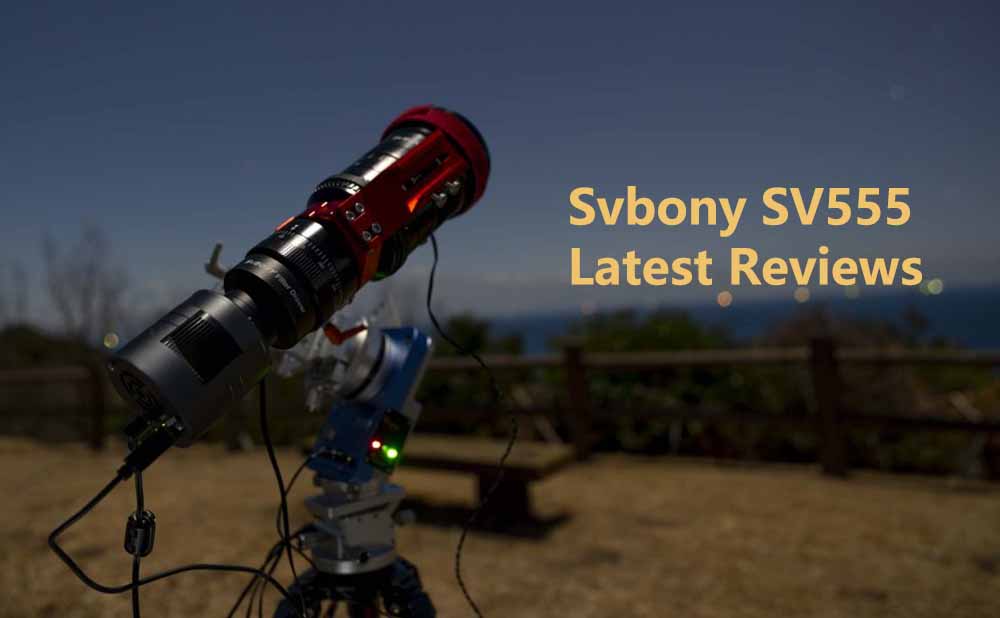
Cheap and good quality - Svbony SV555 Reviews
Note: Thanks to Astronomical Reflexions for their professional and detailed review of the SV555. Since the original article was in Japanese, we have translated it.
Original link: https://reflexions.jp/tenref/orig/2025/02/21/17373/
In recent years, in the field of astronomical telescopes, companies have introduced extremely high-performance astrophotographic devices. With multiple Super ED lenses, lens configurations are no longer limited to four, but include five and six lenses. In this context, will the SV555 with a standard ED lens be a strong contender? What is their positioning and division of labor?
In this article, we will review the SV555 in detail!
1. What kind of astronomical telescope (astrophotographer) is the SV555?
1.1 Five-element Petzval configuration

The picture above shows the optical path of SV555 telescope APO. The front group consists of three lenses. This front group consists of a center convex lens (ED lens) sandwiched between two concave lenses, similar to the company's SV550 series of three-element compound achromatic telescopes.
The large center convex and concave lenses in the final group are far apart, creating the (modified) Petzval configuration, which is commonly used in high-performance astrophotography. Roughly speaking, the Petzval configuration effectively corrects for peripheral blur while reducing costs by not using expensive SD (Super ED) lenses and improving performance by using three lenses in the front.
1.2 What is the chromatic aberration of a normal ED lens?
Today's flagship high-performance telescopes commonly use one or more SD (Super ED) lenses, so there is a concern about whether chromatic aberration can be satisfactorily corrected with just one normal ED lens.

Above is a longitudinal aberration chart (a chart of the focal position of each wavelength from the optical axis to the outer edge of the lens: axial chromatic aberration and spherical aberration can be evaluated). This is the so-called “undercorrected” type of correction and is not a straight line (*1). However, it is worth noting that all wavelengths “bend in approximately the same way”. In other words, it is not the case that “red is clear and blue is blurred”, but the blurring caused by residual aberration appears as “white”. Therefore, the phenomenon (*2) in which the red and blue halos become visible when there is strong emphasis is minimized.
(*1) If the aberration correction is perfect, the result will be a straight line for all colors, and the maximum “bend” of the SV555 is about 0.2 mm. This is about four times the size of other manufacturers' cameras with SD lenses, but about the same size if you look at only 40% (64% light output) of the OD area.
(*2) This phenomenon is the enemy of deep sky astrophotography and requires extreme attention.
This feature is also confirmed in the actual photo examples shown later. It is possible to create telescope barrels with almost no color vignetting, even when using only an ordinary ED lens (*).
(*) Due to a slight residual spherical aberration, a slight halo appears around the star image at the optimal focus position. For details, please refer to the “Star Image Inspection” section below.
1.3 Good peripheral image

One thing worth mentioning about the SV555 is its excellent peripheral image. The image above shows a point image with almost no distortion even at the periphery of the APS-C frame, which is 14mm in height. Even at 22mm image height near the very edge of the full-frame image, there is almost no distortion. The minimum spot diameter is about 10 to 15μ(*1), which is comparable to products from other companies using SD glass. This is a satisfactory level even when using a fine-pitch sensor (*2) with a pixel pitch of 4μ.
(*1) Whether or not Super ED lenses or ED lenses are used makes a big difference in correcting axial chromatic aberration, but there is not much difference in peripheral flow (coma aberration, image dispersion, field curvature).
(*2) Full size is approximately 60 megapixels. Suitable for Sony sensors equivalent to IMX455/571/533
1.4 Cost-effective - low price, high performance
We have achieved satisfactory high performance at a low cost. This is the biggest feature of SV555.
It can be said that an expensive product with excellent performance is a matter of course. The improvements in telescope performance in recent years are cause for celebration, but if they are too expensive, the number of users will decrease. What we need is not only “high performance but high price” products, but also “reasonable high performance but low price” products.

- Orion Center. Satisfactory image quality from the center to the edges.
- SV555 (fl=243mmF4.5) ASI6200MCP 2 min.
- 60 fps Comet BP Filter SXP Equatorial BXT, NXT, SXT Used
- Kumamoto Prefecture Sansan Village
- Captured by Astronomical Reflexions
At first I was skeptical that it was possible to create a high performance astrophotographer using only an ordinary ED, but when I actually used it I was very impressed. The design concept, the level of implementation and the results of the SV555 are outstanding. It can be said that Svbony did not focus their engineering efforts on achieving “ultimate high performance”, but rather on achieving “balanced performance with a good price/performance ratio”.
1.5 Package display
The product comes in a nice presentation box with instructions and each part is stored in foam.

The telescope body is further stored in a soft case. It also includes telescopic tube, dovetail groove and telescopic tube handle. It also comes with fittings, belts, pulleys for using the EAF (electric focuser), and spacers to extend the distance between the telescope tube strap and dovetail slot. Almost everything you need is in one package(*).
(*) Camera adapter sold separately.
1.6 Telescope tube display
The telescope barrel is made of metal and is quite heavy (actual measurement is about 1,900 grams). It has an aperture ring and a helical focusing ring that looks like a large camera telephoto lens.

A 72 mm diameter filter can be mounted to the tip of the lens. The lens cap also has spring-loaded fasteners, just like a camera lens. The hood is fixed but not too bulky as the telescope barrel itself is short.
The rear end of the lens is fitted with a plate with an M48P0.75 male thread to which a camera adapter or attachment ring can be attached. The recommended optical path length from the rear plate is 55 mm.

(Left) Increasing the exposure time makes internal reflections easier to see. (Right) Vignetting observed from the edge of the camera mount. This is the intensity of the visual internal reflection.
As for internal reflections within the telescope barrel, there is a concern about reflections within the sleeve between the last set of lenses and the lenses before it. This can be addressed by making the inner diameter of the telescope barrel as thick as possible and inserting a blackout ring, but for smaller telescope barrels, the outer dimensions will also be limited. I understand that there are various tradeoffs, but I would like to see some clever ways to further minimize internal reflections.
1.7 Imaging results demonstrated - beautiful starry sky images with almost no dark corners or cracks!

- M45 Subaru
- SVBONY SV555 (fl=243mmF4.5) EOS6D (SEO-SP4 Astronomical Modification) ISO2500
- 1 min*180 shots Flat, no darks, toned with SPCC, emphasized with STF No BXT Enlarged
- most of the side of the 1000 μm SWAT-350 Equatorial Instrument Stellar Tracking
- Kumamoto Prefecture Yamamura
On the other hand, the lack of vignetting and the abundance of peripheral light is excellent. There is almost no “breaking” of the stars due to vignetting and the image of the outer stars is not distorted(*). See also the flat image in the next section.
(*) On the other hand, very slight light streaks can be seen in the center. Is this due to a slight protrusion on the lens cell or aperture blade? However, when you start thinking about light of this size, where in the world can you find a satisfactory telescope? It becomes a problem at that level.
The SV555 probably won't be used for narrow aperture deep sky photography, but just like a camera lens, the narrower the aperture, the more diffracted light the aperture blades produce (*).
(*) Although I wasn't able to try this one this time, by narrowing the aperture slightly (a few millimeters in diameter), it might be possible to get sharper images of bright stars. If anyone confirms this, please let us know.
1.8 Lens Barrel Strap

When not using EAF. It is lighter and more compact. (Right) With the EAF installed, a “clog” is sandwiched between the telescope tube strap and the dovetail plate to make sure there is room for the EAF.
The telescope tube strap is made of carefully machined aluminum. Also included is a telescope handle that can be easily attached to the telescope tube and carried with it.
The telescope tube handle is a Vixen-compatible viewfinder dovetail that allows you to attach components such as a guide mirror or ASIAIR.

The locking screw on the telescope tube strap is an M5 knurled screw, but the small head makes it often difficult to finger-tighten it into place. M5 screws are also included, so it is best to use these if you intend to leave them on the telescope tube (*).
(*) If they are tightened too loosely, the telescope tube may shift during shooting, or the EAF may not stop at the end point and the telescope tube may rotate.
Parts of the telescope barrel strap. The telescope barrel strap is generally sturdy and beautifully made, but a bit heavy.
The dovetail plate has grooves for Arca-Swiss compatibility, but extra long screws are required if you want to mount it upside down. Especially when using the EAF with clogs (right side of the photo above), it is not possible to mount the clogs in a stable manner. It is best just to use it as a Vixen compatible dovetail.
1.9 Swivel

The rotation is very smooth. The three scales are spaced 120° apart from each other and can be easily seen from any position. The telescope tube has a swivel at the end. It is nice that the scales and indicators are very large and easy to read. It may be a matter of preference, but bold lines and large letters are easier for the eye to read than lots of fine markings, especially for older people.
1.10 Installing the Filter

① Unscrew the four screws and remove the stopper at the rear end of the telescope barrel. ② Screw the 48mm filter inside the baffle. ③ ④ Secure the baffle plate with the four screws to complete the installation.
It is possible to install a 48mm diameter filter inside the telescope tube. I say “somewhat” because mounting the filter requires careful work, as shown in the picture above(*).
(*) Personally, this is not a task I would particularly want to do on a movie set.
When using a DSLR, this is practically the only way to install filters, so you have to make the most of it, but for CMOS cameras used for astronomy, you can solve the problem using the “filter drawer”.

The picture above shows the SVBONY Astronomy CMOS camera “SV405CC” with the filter drawer “SV226”. This makes it easy to insert filters.

- sh2-308 Milk Can Nebula.
- SV555 (Focal length 243mm F4.8) SV405CC -10° Cooling Gain300 90 seconds 120 frames Dark Plane Application
- SV220 Double Narrow Band Filter SWAT-350 Equatorial Instrument Stellar Time Tracking
- Processing with SPCC, BXT, NXT, SXT Finished with Photoshop
- Toyama Observatory, Kadokawa-cho, Miyazaki Prefecture
- Captured by Astronomical Reflexions
This is an example. If you shoot only one subject per night using long exposures, there is no need to change filters in the field, but the filter drawer is very convenient!
2. Focusing and EAF (Motorized Focuser)
2.1 Focusing Structure

The focus ring moves all the way to the infinity side. (Center) The focus ring is aligned with the infinity mark. (Right) The actual focus position for the configuration used in this case.
The SV555 is helical and looks like a camera lens. Distance indications such as the infinity mark are engraved on the focus ring. Starting with batches shipped in January 2025, the focus ring will be able to rotate slightly beyond the infinity mark (*).
(*) Previous batches would stop at the infinity mark in the figure above, but this has been improved due to temperature variations, individual differences, and the need to operate outside of the focus point to plot a V-curve during EAF operation.
In this actual use environment, the focal point was located on the right side of the above graph (approximately midway between the infinity mark and the 164 foot scale). The focus point will move closer when the filter is installed.
In addition, the focusing mechanism of the SV555 does not “extend the entire optical system” but only moves the last lens group back and forth. Therefore, the optical characteristics may change when focusing. It is recommended to keep the back focus distance as close as possible to the recommended value (*).
(*) I mainly use this lens with an EF-mount adapter ring mounted on the back of the barrel, and the actual optical path length is 10.3 mm. I also use a 2mm filter, but there is no noticeable change in the peripheral image and it doesn't seem to affect the back focus too much.
2.2 EAF kit comes standard

One of the attractions of the SV555 is that it comes standard with an EAF (electric focuser). It comes with a belt and pulley that fits perfectly in the groove of the focus ring, as shown above.
The EAF is mounted on top of the dovetail plate, in which case the supplied spacer attaches to the telescope tube strap, creating a “clog” effect. It is not particularly difficult to put on, but care may be needed when tightening the strap at the end (*).
(*) I loosened the fastening of the black mounting bracket and dovetail plate by about 1 mm, pulled the EAF towards the plate to hold it in place, and finally tightened the black mounting bracket to apply tension.
2.3 Focusing the EAF in practice

Example of focusing using ASIAIR's autofocus function. The ASIAIR's focus step is set to 100 steps.
When focusing with EAF, it is important to set the focus increment value. If it is too fine, the “V-curve” may not be drawn correctly, or the time required to move may be unnecessarily long. If it is too coarse, the focusing accuracy will be reduced. In my environment, it works well when Step Size=100(*).
(*) EAF Focal Plane Shift per Step The difference in focus position between with and without a 2 mm thick filter is approximately 1,200 steps (0.7 mm change in optical path length). By calculation, the focal plane shift per 100 steps is about 60 μm. On the other hand, the Airy spot diameter of the SV555 at F4.5 is 6 μm (for a wavelength of 550 nm), and the focal shift required to produce a dispersion circle of 6 μm in diameter due to the focus shift is 6*4.5 = 27 μm, which corresponds to about 47 steps in the EAF step conversion. Theoretically, if you can adjust the focus with an accuracy of ±50 steps, the maximum dispersion will be approximately the same as that of the Airy spot.

The camera used was an ASI6200MCP (pixel pitch 3.76μ)
The state immediately after focusing with EAF. According to ASIAIR's “detection” display (*), the star image diameter is 1.93 pixels. This means that the star image is about 2 dots in diameter and the sensor resolution and optical performance are almost the same, or the sensor resolution is actually insufficient. As a full-size 62 megapixel camera, it is fair to say that the optical performance of the SV555 is high enough.
(*) Please note that the evaluation of the star diameter calculated by the software may vary from software to software, even for the same image. The “detected” display on ASIAIR seems to be slightly smaller. Of course, this also depends on the quality of the observations.
2.4 Focusing with the Bakhtinov Mask

The star image in the center of the field of view is magnified to 1:1, with each side measuring 820 μ. The larger the number, the closer the focusing distance, and the smaller the number, the closer the focusing distance.
Even with the Bahtinov mask, highly accurate focusing is still possible. The image above was taken continuously, with the focus position moving 50 steps at a time. The light band is clearly asymmetrical between the step values “3450” and “3250”. As far as light is concerned, the optimum position is considered to be around “3350”, but in practice, any position closer or closer to this position will not be a major problem. Based on these actual shooting results, it is safe to say that by using the Bahtinov mask, it is possible to use the EAF(*) to adjust the focus with an accuracy of ±50 steps.
The advantage of connecting the EAF is that it allows you to autofocus(*), but I feel that using the Bahtinov mask in environments with minimal temperature fluctuations is sufficient.
(*) An EAF that automatically incorporates focus into the shooting sequence is useful if you are leaving the camera on overnight.
On the other hand, I have found it extremely difficult to achieve stable focus without the help of a Bahtinov mask or EAF. For best results, the use of a Bahtinov mask or EAF is highly recommended.
3. Optical system evaluation
3.1 Vignetting (flat images)

SV555, aperture F4.5, ASI6200MC, photographing a flat object facing the blue sky. Enhance the original image by adjusting the level.
The SV555 has very good peripheral lighting. The image above is a flat image taken with a full-size astronomical CMOS camera, the ASI6200MC Pro, but with very little dark corners. This is one of the best telescopes I have ever used (*). No exaggeration. The amount of peripheral light is on par with flagship models.
(*) Please download and check the planar image before calibration. The link is provided at the end of the article.

SV555, aperture F4.5, EOS6D (SEO-SP4), shooting a flat object against a blue sky background. Enhance the original image by adjusting the levels.
More notably, DSLRs are almost completely free of “reflector box vignetting” (*). This is probably due to the short focal length and the fact that the beam is extended by the last set of concave lenses.
(*) I was curious as to why the dimming contains not only circular components but also some rectangular ones, but the reason for this is not clear. At least, it is not thought to be due to the properties of the telescope barrel.
By the way, this is an illustration of the principle of “mirror box vignetting”. Mirror box vignetting is usually very difficult to correct completely, but it does not seem to be a major problem for the SV555.
3.2 Star Image Inspection

Example [1] M45 Pleiades SVBONY SV555 (fl=243mmF4.5) EOS6D (SEO-SP4 Astronomical Improvement) ISO2500 1 min*180 frames Flat, no darks Superimposed with Drizzle x2 Image processing with PixInsight SPCC, MGC, BXT, NXT, SXT Finish processing with Photoshop SWAT Photoshop for finishing SWAT-350 Equatorial instrument Stellar tracking Miyama Village, Kumamoto Prefecture
Now let's take a closer look at the performance of the SV555. The image to be examined is an example of the Pleiades (M45) taken with the digital camera EOS6D. The image above is the final result after various image processing programs, but for a more accurate check of the star image we will use the image below, where the enhancements have been made as simple and straightforward as possible
Example [1] M45 Pleiades SVBONY SV555 (fl=243mmF4.5) EOS6D (SEO-SP4 Astronomy Improved) ISO2500 1 minute*180 frames Flat dark, overlay Drizzle x2, enhanced with PixInsight STF, saturation +70 SWAT-350 in Photoshop Equatorial meter, star tracking, Miyama Village, Kumamoto Prefecture
In the image above, the only non-linear processing is PixInsight's STF (Screen Transfer Function) and Photoshop's Saturation Enhancement of +70, and of course there is no BXT. let's zoom in on the four corners and center of this image.
Each side is cut to 200 μm from corner to center, and except for a slight comet aberration in the lower left corner, the star image is very sharp and even, with very little halo.
It is hard to believe that such a star image can be seen on an astronomical camera that costs less than 100,000 yen.

The original image after stacking was evaluated using PixInsight's FWHM eccentricity (*). Because of the 2x rain processing, the star image diameter is actually half this, or a median of 2.4px. The EOS 6D has a pixel pitch of 5.76μm, giving a star image diameter of 14μm. Of course, it's larger than the Airy spot, but still delivers top-notch performance.
(*) Refer to the blog “Looking for the place where the stars fall” https://tarkungh.net/fwhmeccentricity-script/
There is a slight difference in the diameter of the star images from left to right, but this may be due to a slight deviation in the square of the camera or a problem with the optical axis or the center of the telescope tube. The difference is very small and the image is good enough.

Let's take a closer look. The image above was taken with the focus position shifted 50 steps using the EAF. The aperture was also set to two different states: open F4.5 and one stop down, F7.1.
The first thing to notice is that the star image is hardly distorted at all, even at the very edge of the frame. In addition, as predicted by the aberration map, the colored halos of the bright stars are almost imperceptible.
Distortion of the peripheral image is minimized by the 5-chip Petzval structure, and at the cost of accepting a small amount of spherical aberration, imaging in line with the design concept is achieved so that the correction of spherical aberration due to color is as even as possible (*).
(*) If you search the Internet for “SD telescope aberration diagrams”, you will find a wide variety of aberration diagrams. Looking at these charts, you will see that the primary design focus of most astronomical telescopes is to “balance chromatic and spherical aberrations (even if the spherical aberration trend is different for each color, as shown above, make sure that the focal lengths of each color match around the 0.7 ring region).” As a result, the trend of the residual spherical aberration will also vary depending on the color, resulting in a “colored halo” around the star image.

Comparison of the spherical aberration map of SV555 with the star image at each focal position. The scales at the focal positions (EAF step values) on the aberration map are roughly aligned, but the left and right positions are estimates. The horizontal axis of the spherical aberration map is magnified by a factor of four to make it easier to see.
Next we look at the spherical aberration with some amount of residual aberration.From the above figure, we extracted the center focus position and the image change due to the aperture and superimposed it on the spherical aberration map.
The in-focus and out-of-focus star images show a typical trend of undercorrection.At the focal position of about 3600 (out-of-focus image), the core of the star image (the light image through the center) is surrounded by a halo (a slightly blurred star image through the periphery). On the other hand, at the focal position of about 3400 (inner image), the image looks like a well-defined, slightly blurred disk.
At focus position 3400, which is considered the best focus position, there is a slight halo around the bright star, but the star image is still quite satisfactory.
Changes in the star image due to aperture changes are also shown in the spherical aberration plot.By narrowing the aperture from F4.5 to F7.1, light from the outer edges of the farther focus point is not used for the external image, thus reducing halos and making the image sharper. On the other hand, the internal image does not show a star image diameter like the reduction is as large as the aperture reduction. The SV555 is unlikely to be used for astrophotography at small apertures, and while aperture reduction does improve the outer star image, it does not have much effect on the inner image.Most importantly, when using small apertures, it is very important to “focus with a narrower aperture” (*).
(*) In the case of camera lenses, it can be said that a focus shift results when the aperture is narrowed.This is common in undercorrected optical systems.
There is no need to realize all these complications when it comes to the actual focusing.Simply use a Bahtinov mask or EAF to fine-tune the focus and you will get the best image possible. However, it is worth remembering that there will be a slight halo on the outside of the image, while the inside of the image creates a well-defined, blurred image. In addition, there is a very slight blue halo on the inside of the image and a very slight red halo on the outside of the image. This result is also consistent with the spherical aberration map.
3.3 Effect of BXT (BlurEXterminator)

M45 Pleiades, cropped from the center of the four corners, with BXT applied. The size of each side is 200μm
Everyone loves BXT ( BlurEXterminator ). SV555 also works very well.Above is an image with 200μm on each side cut by BXT. Yes, it's fantastic.The gyro-like star image in the lower left corner has also been corrected and is now almost perfect.
Evaluated by PixInsight's FWHM Ecocentricity.Thanks to the 2xDrizzle(*) effect, the diameter of the star image has been reduced to less than a third of its original size.The median value corresponds to 0.85 px, or 4.9 μm. this is smaller than the diameter of the Airy spot (6 μm).
(*) In images where the sensor resolution is lower than that of the optical system (undersampling), the effect of BXT is even more pronounced by increasing the number of pixels by specifying “Drizzle” when stacking.
BXT is a very powerful tool.The license fee is by no means cheap, but it is definitely worth using in order to realize the full potential of the SV555.
4. SV555 is suitable for those people?
4.1 For beginners of astrophotography
The SV555 is one of the best products for those who want to start deep sky astrophotography. Few dark corners and color halos make image processing less difficult(*1), the short focal length makes tracking accuracy and visual acuity less affected(*2), and the compact body allows use with a small equatorial instrument, making it an easy-to-use astrophotograph for beginners.

- Gouyu Nebula
- SVBONY SV555 (fl=243mmF4.5) E-M1MarkIII Astro ISO6400 60 sec,
- 90 frames No filter, dark, no flats Processed with SPCC, MGC, BXT, NXT, SXT,
- completed with PS SWAT-350 Equator Stellar time tracking
- Miyama Village, Kumamoto Prefecture
- Captured by Astronomical Reflexions
-
(*1) However, when viewed from a very severe angle, the bright stars in the center tend to become slightly magnified due to the balance of the aberration correction.I highly recommend getting hold of an anti-convolution tool like the BXT.
(*2) Although it is said to be “unacceptable”, this is only a comparative statement. The SV555 has a short focal length of 243 mm, but its high performance suffers greatly on days with poor observing conditions.
The example above was taken with an E-M1MarkIII Astro, a mirrorless astronomical camera with a 4/3 (three-quarter) sensor, but was not flattened. If the sensor is smaller than the APS-C, not flattening doesn't seem to be a big deal.
4.2 Astronomical cameras with “wide-angle” views as auxiliary telescopes
When combined with a full-frame sensor, it is possible to create an astrograph with a fairly wide viewing angle. For an APS-C sensor, this corresponds to a full size of about 370 millimeters, which is still an easy-to-use wide angle of view.
The SV555 is a compact unit that can be used with little or no intervention. It is also recommended as an auxiliary device.
4.3 The Astrograph has also been reduced in size - despite its small size, it can still take great pictures!
Use the SV555, the astronomically cooled CMOS camera SV405CC, and the dual narrow-band filter SV220 to photograph the Milk Can Nebula. The equatorial instrument is the SWAT-350, a portable equatorial instrument known for its high accuracy and lack of autoguiding.The SV555 lets you shoot with a simple, compact system.
This is true of all the high-performance astrographs in the 50mm class, but with a compact body size that makes it easy to set up and deploy your equipment.Expedition photography with large telescopes and large mounts can be quite tiring.With the SV555, you can get the same or better images than with older 80 to 100 mm diameter refractors. It's also perfect for those who want a small, high-performance telescope to take pictures easily and effortlessly.
4.4 Focal length for TV viewing
The short focal length of 243mm makes it the best choice for telephoto viewing with small sensor CMOS cameras. With an aperture of 54mm F4.8 and plenty of light, you get lower noise effects and shorter total exposure times than with today's popular smart telescopes.However, although it is small, it is surprisingly heavy (2.45 kg without EAF), so you should choose your mount carefully.
5. Our expectations for SV555
5.1 Lightweight
The actual weight of the SV555 is about 2,870 grams with the EAF installed and about 2,450 grams without the EAF installed.
The SV555 astrograph telescope APO is heavier than it looks. It is slightly heavier than similar astronomical cameras made by other companies.
It's heavy, but the absolute weight is just under 3kg, but a little lighter would be nice. One of the things users are trying to say is that they want it to be lighter.
5.2 Need a storage box
Comes with a box for storing the telescope tube, but only if the telescope tube strap is removed. When used for astrophotography, the telescope tube straps are usually left on all the time and therefore not easy to transport. It would be great if it came with a large box to store the assembled kit (*).
(*) Maybe just think of it as “a stylish cushioning material” ......
5.3 Further anti-reflective measures on the inner surface of the mirror tube
The image on the right is the image on the left, heavily enhanced. It was taken with an SV555 and an ASI6200MCP.
As mentioned in the previous section, the SV555 has some internal reflections that are a bit concerning (*1). Internal reflections can also be a problem when there is a very bright star outside the field of view, as shown in the example above. Due to internal reflections from Sirius in the lower right, a very faint rainbow-colored ghost shadow appears beyond the field of view. This phenomenon is by no means a problem unique to SV555. When there are bright stars in or near the field of view, such as Sirius and IC2177, or the Horsehead Nebula and Cepheid I, the appearance of this type of ghosting is quite common, depending on luck (*2). However, as a user, I can only say “please try to improve it somehow”.
(*1) It's a bit old-fashioned, but I've heard before that “it's mainly the Japanese who are so critical of the measures taken to deal with internal reflection”. This may be because many scenes are shot in light-polluted areas, but preventing internal reflections is extremely important in deep space photography, so I'd like to see further improvements.
(*2) It is almost impossible for the user to predict which part of the telescope tube the light from a bright star will enter. This can happen if you are unfortunate enough to hit a highly reflective area.
5.4 Feedback on current upgrades
My impression is that SVBONY is quick to incorporate user feedback into their products. I've been reviewing the SV555 astrophotography telescope since December 2024, but the requests I mentioned in the previous section, such as “make the set screw on the barrel strap compatible with a hex wrench” and “make the focus ring able to rotate beyond infinity,” are reflected in the products shipping after January 2025. Both are reflected in products shipped after January 2025, and I think this attitude is very commendable. I think this attitude is very commendable.
On the other hand, although the issues raised in this section, such as “weight reduction,” “storage cases,” and “measures to prevent internal reflections,” are not easy to implement, I think it's a good thing that we're doing this. “If we can vocalize it properly, it might be useful for the development of the next product” (*).
(*) Please consider!
Summary
Photographing the M45 Subaru with the SV555. Despite the popularity of CMOS cameras for astronomical research these days, digital cameras are the ones that can take advantage of wide aperture at a low price.
What about it?
Although it costs less than 100,000 yen, the SV555 realizes extremely high performance. I think it will be of great value to the astronomical community in broadening the base of deep-sky astrophotography. The design concept of achieving this level of performance without the use of SD (Super ED) lenses, and the realization of this in the product, is highly commendable(*).
(*) Low-priced products are often not built as designed, but with the SV555, to my surprise, the results were exactly as shown in the aberration chart. However, we must not forget that this telescope is the “cheapest in its class”. On the contrary, it should be commended for achieving this level of performance at such a price.
There is a first-class performance in terms of richness of peripheral light, stability of star images from the center to the corners, etc. The only difference is that due to its spherical shape, the telescope is not as good as it could have been. The only difference is that there is still a slight “white halo” (*) around the stars due to insufficient spherical aberration correction. This is the only difference between this lens and the flagship Astrograph, which uses a lot of SD (Super ED) lenses.
(*) This halo is not visible unless you zoom in to 1:1. Blue or red “vignettes” can seriously upset the color balance when emphasized, but white vignettes do not have this problem. The lack of color in the halo is a design innovation unique to the SV555 and one of its beautiful features.
“Inexpensive but produces great photos” ”This is the closest thing to a flagship budget model.” the SV555 astrograph will surely enrich your astronomical life.
So, we wish you all a happy astronomical life!
Thanks again to Astronomical Reflexions for its professional evaluation. You are also welcome to follow Astronomical Reflexions to get the latest astronomical information.
Are you seeking a product that seamlessly blends efficiency and innovation, perfect for compact travel astrophotography? Look no further! The SV555 astrograph is your ultimate solution. Get free shipping now.