
Blog
Table of Contents

SV205 Planetary Camera Complete User Guide
SVBONY SV205: An 8MP USB 3.0 planetary camera, the Upgraded Version of the SV105. The SV205 is capable of capturing images of the moon and planets at night, and also supports daytime use. By utilizing the SharpCap software and manually adjusting settings such as exposure time, gain, and white balance, users can achieve sharper and more magnified images compared to the 2MP SV105.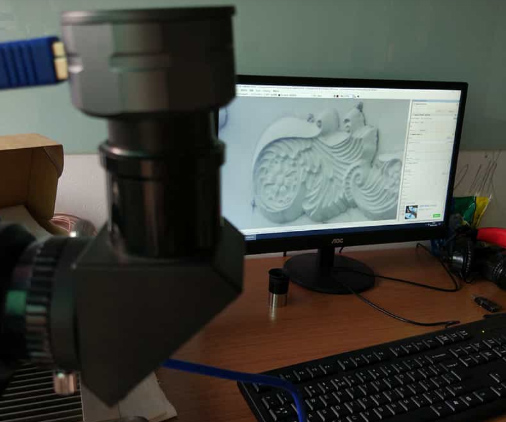
Daytime Test Sharing
This test primarily focused on evaluating the SV205 camera's performance in daytime usage scenarios. The test was conducted using the specialized astronomical imaging software SharpCap, which ran smoothly on a Windows 10 system without any compatibility issues.
To achieve optimal image quality, we recommend using the maximum resolution of 3264×2448 (8 megapixels) and selecting the YUY2 color space format. Upon initial use, the camera's feed may exhibit color bias or blurriness. Image quality can be optimized by adjusting the following key parameters:
1. Exposure & Gain: It is recommended to first set a relatively low exposure time (62.5ms was used in our test) and then gradually adjust the gain value (set to 75 in the test) to balance the overall brightness of the image.
2. White Balance: Enabling the auto white balance function can effectively correct color rendition.
3. Other Parameters: Fine-tuning can be performed with reference to settings such as Contrast at 50, Saturation at 12, and Sharpness at 60.
The SV205 utilizes a USB 3.0 interface for data transfer. Please connect it to a computer's USB 3.0 port to leverage its high-speed transfer capability (achieving up to 15 frames per second in our test). If connected to a USB 2.0 port, the transfer speed will be limited.
Q&A:
Q1: How do I update the firmware for the SV205 camera (IMX415 sensor version)?
A: This firmware update primarily addresses the issue where the Gain value was not displayed for the SV205 within the SharpCap software.
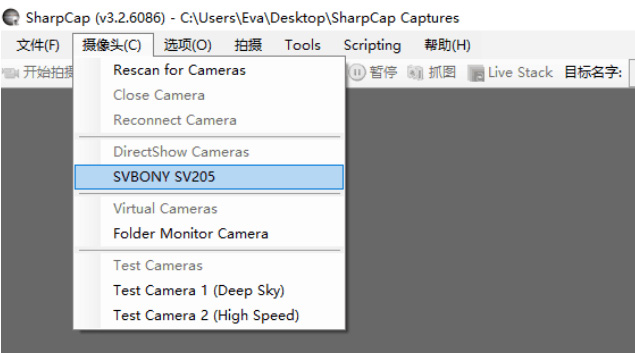
1. Connect the SV205 camera to your computer. Launch SharpCap and ensure a successful connection.
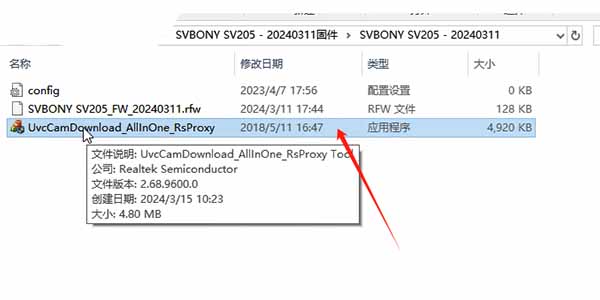
2. Download the firmware update package: Please email info@svbony.com to request the firmware. The firmware version is FW_20240311. Once downloaded, extract the file to access the updater program.
3. Click the updater program to open it.
4. In the upgrade window, click the "Start" button to begin the firmware update process.
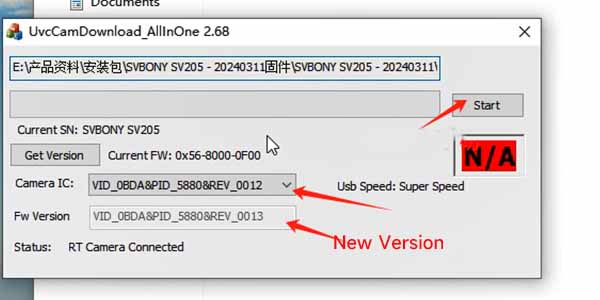
5. Once the update is complete, you will see a "{pass}" message indicating the firmware has been successfully updated.

6. Close SharpCap and disconnect the data cable between the camera and the computer. Wait for one to two minutes, then reconnect the camera and reopen SharpCap to verify if the upgrade was successful and if the gain adjustment option is now available.
Q2: When connecting the SV205 camera to a Windows 7 system, the computer fails to recognize the device. How can this be resolved?
A: This is because the Windows 7 system does not include native USB 3.0 drivers. Please follow these steps:
● Visit the official website of your computer brand or motherboard manufacturer to download the corresponding USB 3.0 driver for your specific model. If a dedicated driver is unavailable, a universal version can be downloaded.
● Extract the downloaded file and run Setup.exe, following the prompts to complete the installation.
● After installation, select "Restart computer now" and then click "Finish".
● Right-click on Computer -> Manage -> Device Manager -> Universal Serial Bus controllers to check if the installation was successful.
Q3: SharpCap software cannot recognize the SV205.
A:
● This could be a connection issue. Unplug the USB cable from the computer and reconnect it.
● Check if the correct version of SharpCap software is installed.
● Try using a USB 2.0 port on your computer. If it works on USB 2.0, then try a USB 3.0 port. There might be an issue with the specific USB port connection.
● If none of the above methods work, the USB data cable might be faulty. Please try replacing the USB cable.
Q4: When I click on the SVBONY SV205 [in SharpCap], the screen displays as black.
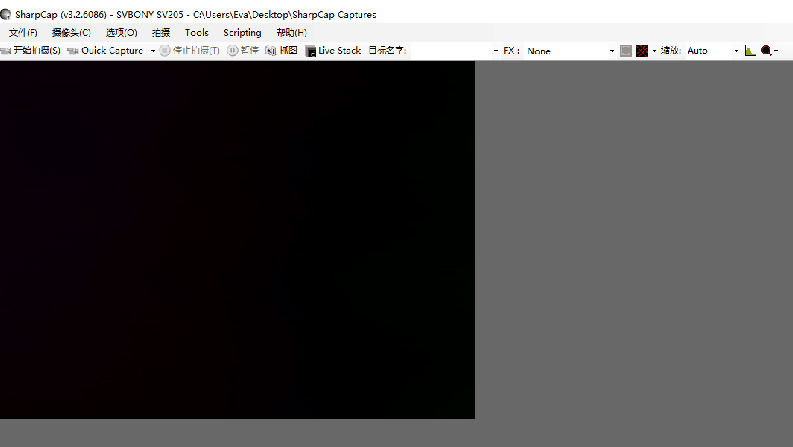
A:Firstly, the SV205 chip is functioning normally. If it were not working, you would not see a black screen, but rather a gray screen.Secondly, please check the camera and image settings. Please increase the exposure time.As you can see, when the exposure time is increased to 63 ms, the screen changes and some light becomes visible. (This indicates the SV205 is working normally.)
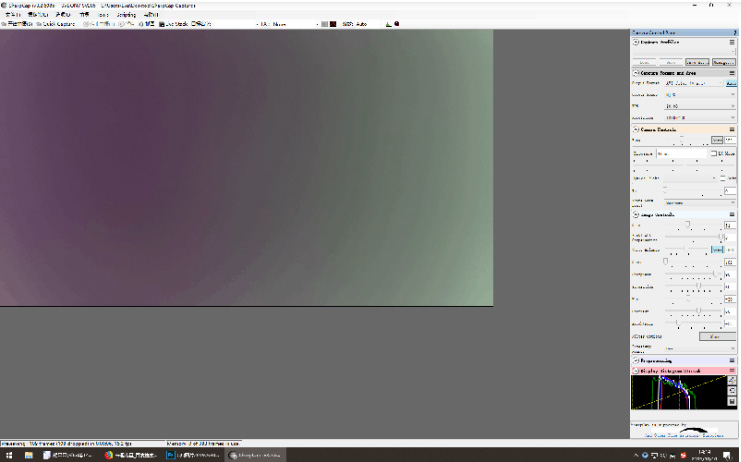
Q5: Why can I only see some light, but no image? And why does it show color?
A:
1. No image? Because the astronomical telescope is not connected to the SV205; only the SV205 camera is connected to the computer. With just the SV205 connected to the PC, meaning only the CMOS sensor is present, it is impossible to see a defined image. Can you take a photo with a Canon camera that has no lens attached? Of course not.
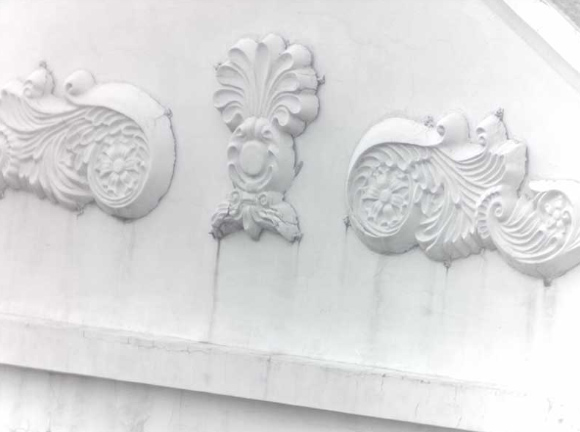
2. Regarding color. This is called pixel vignetting. The SV205 is not perfect in this aspect, but you can improve the image quality by adjusting the image settings: Gain, Tint, Contrast, White Balance, Saturation, Brightness...
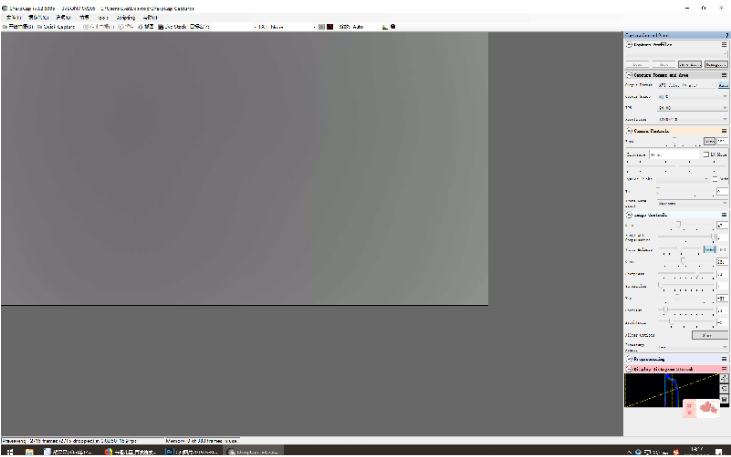
Look, now it's much better. Connect the SV205 camera to the telescope. Then adjust the telescope's focus knob to find a sharp image on your computer screen.
Q6: Is the SV205 camera compatible with the Android operating system?
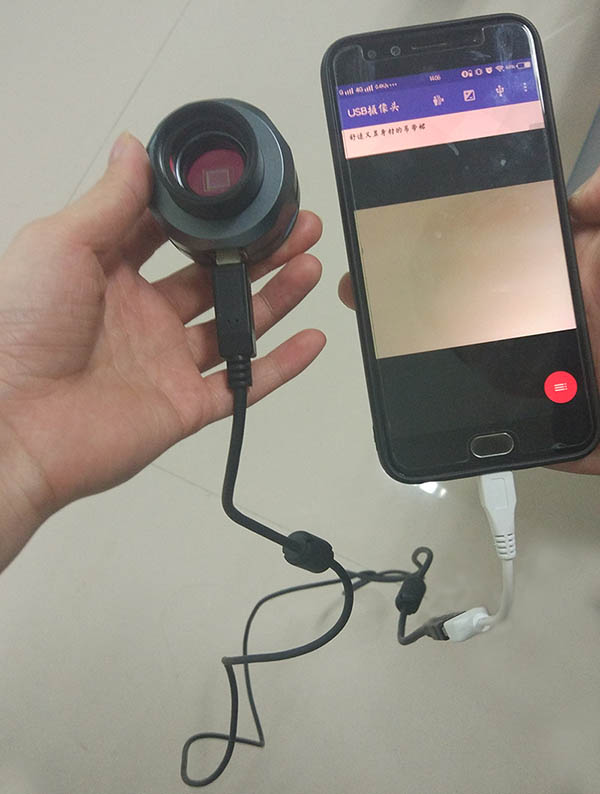

A:The SV205 is a standard UVC (USB Video Class) device. The Android OS supports UVC products.
● Download and install a USB Camera application from your Android app store (e.g., Google Play Store).
● Connect the SV205 camera to your smartphone using its original cable and an OTG (On-The-Go) adapter cable.
● Open the USB Camera app. If the SV205 is not connected to a telescope, you will see some light.Note: Some smartphones have the OTG function enabled by default, while others do not. You may need to manually enable the OTG function. Please find and enable this function in your phone's "Settings". Once enabled, an indicator light should appear on the screen. With the OTG function activated, the SV205 can be used with your phone.
Q7: Can the SV205 be compatible with older versions of the Android operating system?
A: Older versions of Android products may lack OTG functionality and therefore cannot be used with the SV205.
Q8: After connecting the SV205 to an Android system, the image on the phone is not clear. What should I do?
A: When the SV205 is connected to a phone, if a clear image cannot be obtained by adjusting the camera settings, first try connecting the same setup to a Windows PC. Once you see a clear image on the computer screen, the camera settings will be saved. Then reconnect it to the phone; you will find the image becomes much clearer.
Comments (7 )
Renato Braga de Lima Guedes
Hello, i am having exactly the same problem as described above by the other user. I just upgraded my fw sv205, and the upgrade process was successful, but when used, my sv205 does not display any images. when sv205 is connected to a cellphone/computer it
Guest
Salve Ho appena aggiornato la mia telecamera Sv205 ma dopo aggiornamento sharpcap non rileva il nome della telecamera e visualizza USB Boot. e il riquadro di acquisizione non compare più
jose tapia
Hola, actualice mi cámara SV205 con la Versión de firmware FW_20240311 ,instale el programa sharpcap ultima versión y no muestra ninguna imagen. ayuda por favor , he buscado algún firmware anterior que sea .FW ,pero no encuentro nada de ante mano gracias.
Guest
hello, i just upgraded my fw sv205, and the upgrade process was successful, but when used, my sv205 does not display any images. when sv205 is connected to a cellphone/computer it is detected but does not display any images. can you help me explain what h
Thank you for getting in touch, please send us a picture or video of your connection and setup detailing your problem. Our email address is support@svbony.com
Guest
OmubJxQPWjgfnr
Guest
OmubJxQPWjgfnr
Shailesh
I am facing the same issue after the upgrade of my "SV205 planet camera with IMX415 CMOS sensor " no image is coming. Can you please help.